Mold in Walls and Ceilings: Signs, Causes, Safe Removal
Expert guidance from our California remediation team — plus local crews in 50+ cities when you're ready for help.
Most homeowners discover mold in walls by accident — a musty smell that never goes away, paint that starts bubbling for no obvious reason, or a soft spot that gives a little when you press it. Unlike the mildew you can see on shower grout, mold in walls grows hidden inside the wall cavity, feeding on drywall paper and wood framing where you can't reach it with a spray bottle. By the time it shows through the paint, the colony behind the surface is usually much larger than the stain you can see.
This guide explains how to recognize the warning signs, what causes mold to grow inside walls and ceilings in California homes, how to tell whether you can handle it yourself, and exactly how professionals open, clean, and dry a wall cavity so the mold doesn't come back.
In this guide:
- Signs of Mold in Walls You Should Never Ignore
- What Causes Mold in Walls and Ceilings
- Ceiling Mold: Roof Leaks, Bathrooms, and HVAC Condensation
- How Bad Is It? Finding Mold Behind Drywall
- DIY vs. Professional Removal for Mold in Walls
- How Professionals Remove Mold From Inside Walls
- Frequently Asked Questions
- Get a Free Inspection for Mold in Walls and Ceilings
Signs of Mold in Walls You Should Never Ignore
Hidden mold announces itself in indirect ways long before it breaks through the surface. The earliest and most reliable clue is smell. A persistent musty, earthy odor in one room — especially near an exterior wall, a bathroom, or under a window — usually means something is growing inside the cavity. If the smell gets stronger when your heating or AC runs, the growth may be near ductwork or the system may be pulling air through the wall cavity.
Visual clues come next. Look for paint that bubbles, blisters, or peels without a recent paint job failing, wallpaper edges that curl or lift, and drywall that feels soft, spongy, or crumbly when pressed. Water stains that keep returning after you paint over them, yellow or brown ceiling discoloration that slowly expands, and baseboards that warp, separate from the wall, or develop dark staining at the floor line all point to moisture moving through the wall assembly — and where moisture sits for more than 24 to 48 hours, mold follows.
Physical symptoms matter too. If someone in the household develops allergy symptoms — sneezing, itchy eyes, a stuffy nose, a lingering cough — that ease when they leave home and return when they come back, indoor mold growth is worth investigating. Finally, trust your history: any wall that has been wet from a plumbing leak, roof leak, window failure, or flooding event in the past few years is a candidate for hidden growth, even if it was dried on the surface and painted over.
What Causes Mold in Walls and Ceilings
Mold spores are everywhere, indoors and out. A wall cavity becomes a mold farm when three things line up: moisture, a food source, and time. Drywall is the perfect food — its paper facing is cellulose, and the gypsum core holds moisture like a sponge. Wood studs, insulation, and the dust inside a cavity round out the menu. Of the three requirements, moisture is the only one you control, which is why every serious mold problem traces back to a water problem.
In California homes, the most common moisture sources inside walls are slow plumbing leaks — a pinhole in a copper supply line, a failing shower valve, a toilet wax ring that seeps a little with every flush. These leaks can run for months because the water stays hidden, soaking the bottom plate and drywall from behind. Exterior sources are just as common: cracked stucco, failed window flashing, and sprinklers aimed at the house drive water into the wall from outside, a pattern we see constantly in stucco homes across Southern California. In coastal communities, chronic high humidity and condensation on cold water pipes inside walls can be enough on their own.
Ceilings have their own list, covered in the next section, but the principle is identical: something is wet, it stayed wet, and mold colonized the material. Remediation that skips the moisture fix is just a temporary cosmetic repair — the growth will return, sometimes within a single season.
Ceiling Mold: Roof Leaks, Bathrooms, and HVAC Condensation
Ceiling mold almost always means water is coming from above or condensing from within. The most common cause in California is a roof leak — not a dramatic drip, but a slow seep at a flashing point, vent boot, or cracked tile that wets the attic insulation and the ceiling drywall below. The stain you see on the ceiling is usually offset from where the water enters, because water travels along joists and seams before it soaks through. Attic mold and ceiling mold are frequent partners: poor attic ventilation traps humid air, and mold grows on the underside of the roof deck and migrates down.
Bathrooms are the second major source. A bathroom ceiling without adequate exhaust ventilation collects steam from every shower, and that moisture condenses on the coolest surface available — the ceiling. Surface mold from bathroom humidity usually stays on the paint and can be cleaned, but if a shower or tub on the floor above leaks through the ceiling of the room below, you're dealing with a cavity problem, not a surface problem.
The third culprit is HVAC condensation. Air conditioning ducts running through hot California attics sweat when they're poorly insulated or when connections leak cold air. That condensation drips onto ceiling drywall for an entire cooling season, feeding mold you may never see until the ceiling sags or stains. If your ceiling mold appears only during summer AC season and sits in a line or rectangle pattern, suspect ductwork condensation before you blame the roof.
How Bad Is It? Finding Mold Behind Drywall
The patch you see is a poor guide to the size of the problem. A two-inch stain on the surface can be the visible tip of a colony covering several square feet of the drywall's back side. Before anyone cuts or sprays, the smart move is to establish the extent of the growth and, more importantly, find the moisture source feeding it.
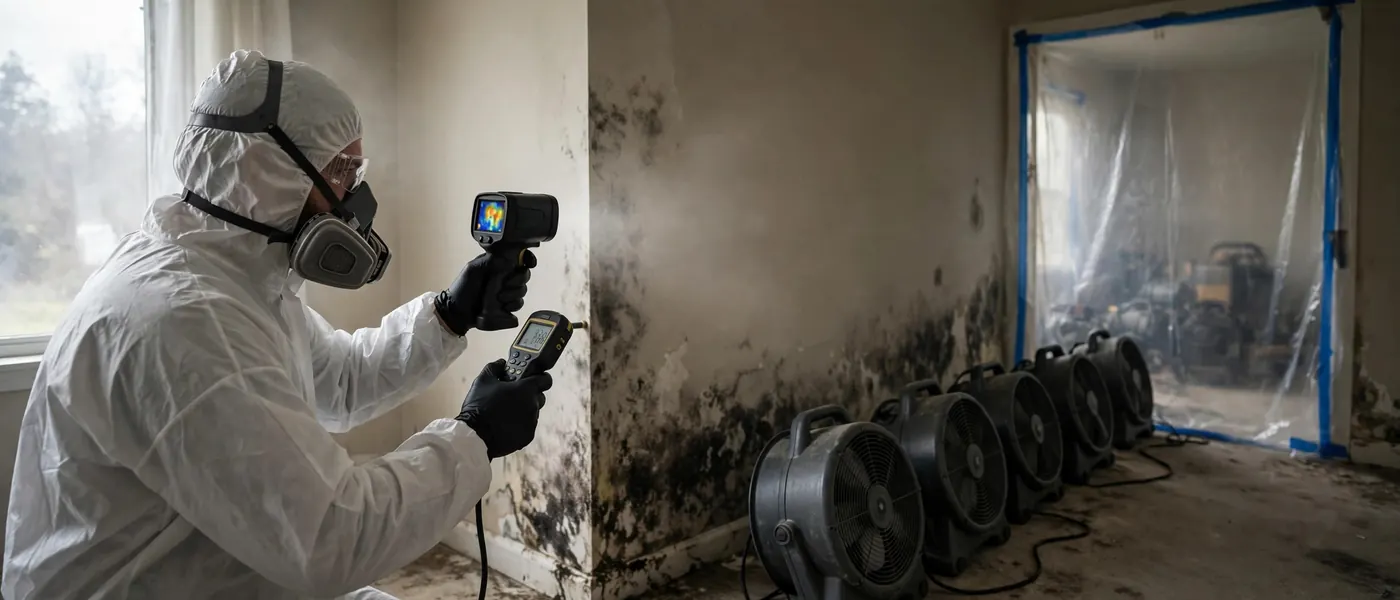
A professional assessment starts with moisture, not mold. Technicians use pin and pinless moisture meters on walls and ceilings to map exactly how far the water has spread — wet drywall reads clearly against dry material, and the map usually extends beyond the visible stain. Thermal imaging cameras add another layer, revealing cool, damp areas inside the wall that meters might miss between studs. For a closer look, a borescope — a tiny camera on a flexible wand — can be fed through a small hole behind a baseboard or inside an outlet opening to photograph the cavity itself.
When the situation calls for documentation — a real estate transaction, an insurance claim, a dispute, or unexplained health symptoms with no visible growth — lab testing of air or surface samples can confirm what's growing and where. That's exactly what our mold inspection and testing services are built for: moisture mapping first, targeted sampling when it actually answers a question. What you should avoid is the opposite order — paying for lab results before anyone has found and fixed the water. Test reports don't remove mold; dry walls do.
One important caution: do not go hunting by tearing into walls yourself without a plan. Disturbing a colony releases a burst of spores into the room, and without containment those spores settle on new surfaces. A small exploratory hole behind a baseboard is one thing; ripping out a sheet of drywall in a living room is how a one-wall problem becomes a whole-house cleaning project.
DIY vs. Professional Removal for Mold in Walls
The dividing line used across the industry comes from EPA guidance: surface mold covering less than about 10 square feet — roughly a 3-by-3-foot patch — on a non-porous or easily cleaned surface is a reasonable DIY job for a healthy adult. Small ceiling patches caused by bathroom humidity, and minor growth around a window frame, usually fall into this category. Clean with detergent and water (bleach is a poor choice on porous materials — it doesn't penetrate, and its water content can feed deeper growth), dry the area thoroughly, fix the moisture cause, and repaint with a mold-resistant primer once everything is dry.
Wall-cavity mold is a different animal, and it's where DIY goes wrong. Call a professional when any of the following are true:
- The visible growth is larger than 10 square feet, or you can smell mold strongly but can't see it — a classic sign of a hidden cavity colony.
- The wall feels soft, the ceiling is sagging or bowing, or drywall crumbles when pressed. Saturated drywall has lost its strength and has to come out.
- The moisture source is a plumbing leak, roof leak, or sewage — anything involving contaminated water or an active leak you can't fully stop yourself.
- The mold keeps coming back after cleaning, which means the cavity behind the surface was never dried.
- Anyone in the home is immunocompromised, elderly, an infant, or has asthma or a mold allergy. The exposure risk during demolition isn't worth it.
- The growth is dark black and spreading across a large area. Extensive black mold removal involves the same containment and disposal protocols as any large job, and it should not be a weekend project.
The cost calculus also matters. A professional remediation of one affected wall typically runs in the site's usual California range — most whole jobs land between $1,500 and $6,000 depending on size — while a DIY attempt that spreads contamination can turn a one-wall job into a multi-room remediation. If you're on the fence, an inspection is cheap certainty compared to a wrong guess.
How Professionals Remove Mold From Inside Walls
Professional wall remediation follows the ANSI/IICRC S520 standard, and the sequence matters more than any single product. It starts with containment: the work area is sealed off with plastic sheeting, and a negative air machine with HEPA filtration pulls air out of the sealed zone so spores released during demolition flow inward, not into the rest of your home. This step is the entire difference between a controlled remediation and a contamination event, and it's the step DIY demolition always skips.
With containment running, the crew opens the wall strategically. Rather than gutting the whole room, they cut a flood cut — typically removing drywall to a clean line above the moisture damage — or open only the bays that moisture mapping flagged. Affected drywall and insulation that can't be cleaned are bagged inside the containment and removed; drywall that's wet but not colonized may be dried in place in some cases, but moldy porous material comes out. Framing is a different story: wood studs and plates are structural and non-disposable, so they're HEPA-vacuumed, cleaned with an antimicrobial, sometimes sanded or media-blasted for embedded growth, then treated with a mold-resistant coating once dry.
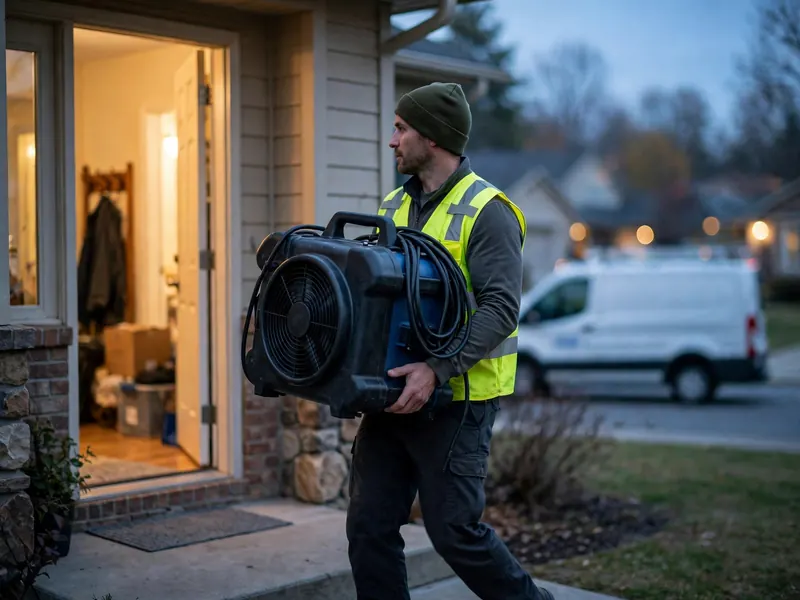
Drying is where good jobs separate from bad ones. Commercial dehumidifiers and air movers dry the open cavity and framing to verified moisture targets — checked with meters, not guessed by touch — because closing a wall over damp framing just restarts the clock. The moisture source gets fixed in the same phase: the leaking valve replaced, the flashing repaired, the condensation line insulated. Only then does reconstruction begin, with new insulation and drywall, and many crews finish with post-remediation verification — a visual check and, when documentation is needed, clearance testing to confirm the cavity is clean before the wall is closed and painted.
Throughout the job, the crew wears respirators and protective suits, and the work area stays under containment until final cleaning is done. Your role is simple: keep people and pets out of the sealed area, and don't be alarmed by the equipment noise — those machines running for two or three days are what "dry" actually sounds like.
Frequently Asked Questions
Can mold in walls make you sick?
It can contribute to allergy and asthma symptoms — congestion, coughing, itchy eyes, headaches — especially for sensitive people, and long-term exposure in a home with extensive hidden growth is a legitimate health concern. If symptoms track with being home, treat that as a reason to investigate the walls, not just the air.
How do I know if mold is behind my wall without opening it?
Start with the indirect signs: a musty smell in one area, bubbling paint, a soft spot in the drywall, or stains that return after painting. A professional can confirm with moisture meters, thermal imaging, and a borescope through a tiny hole — no demolition required for the diagnosis itself.
Will painting over mold in walls fix it?
No. Mold-resistant paint over an active colony seals in a problem that's still feeding on the drywall from behind. The stain will bleed back through, and the growth continues unseen. Paint is a finishing step after removal and drying — never the fix itself.
How long does professional wall mold remediation take?
A single affected wall typically takes 1 to 3 days, including drying time. Multi-room or ceiling-and-wall jobs can run 3 to 5 days, plus reconstruction time for new drywall and paint after the remediation itself is verified complete.
Does homeowners insurance cover mold inside walls?
Often, yes — when the mold resulted from a sudden, covered event like a burst pipe or a failed appliance hose. Mold from slow, long-term leaks or neglected maintenance is usually excluded, and many California policies cap mold coverage at a sublimit. Check your policy before assuming either way.
Get Mold Remediation in Your City
Need Mold Removed Fast?
Our California crews are ready 24/7. Call now for a free assessment and an upfront flat-rate quote in writing.
Upfront flat-rate pricing • Written guarantee • 24/7 emergency service